
For Agents
13 min read
8 Real Estate Photography Techniques For Successful Listings
If you’re a motivated real estate agent with a DIY attitude, you might decide to try your hand at taking your own listing photos. Research indicates that listings with professional photos sell 32% faster than those without, so it’s definitely a good idea to use some real estate photography techniques to up your game! But don’t worry - you don’t need to be an artistic genius or spend an arm and a leg to take great listing photos. In this post, we’ve got some simple tips that are easy for anyone to try.
Technically, you can get away with just using your phone for real estate photography. But because professional photos can have such a big impact on your listing’s success, you may decide it’s worth grabbing a bit of special equipment. It’s best to make sure you have:
Of course, this isn’t an exhaustive list. If you find that you really enjoy photography, you can always buy new lenses, remote triggers, lights and other fancy gear to take your photos to the next level.
The weather and the time of day often have a big impact on how pictures turn out. Mid morning is often good, as the sun’s fairly bright but usually isn't too harsh. Or, you could try shooting in the late afternoon or early evening to get that “golden hour” look. Soft, dusky light also looks great in exterior shots, as you can turn all the lights on for a warm and inviting effect.
Before deciding what time to schedule for, make sure you check the weather forecast as well. A cloudy day will allow you much more flexibility with the time of day that you shoot than a sunny day, which can be too bright.
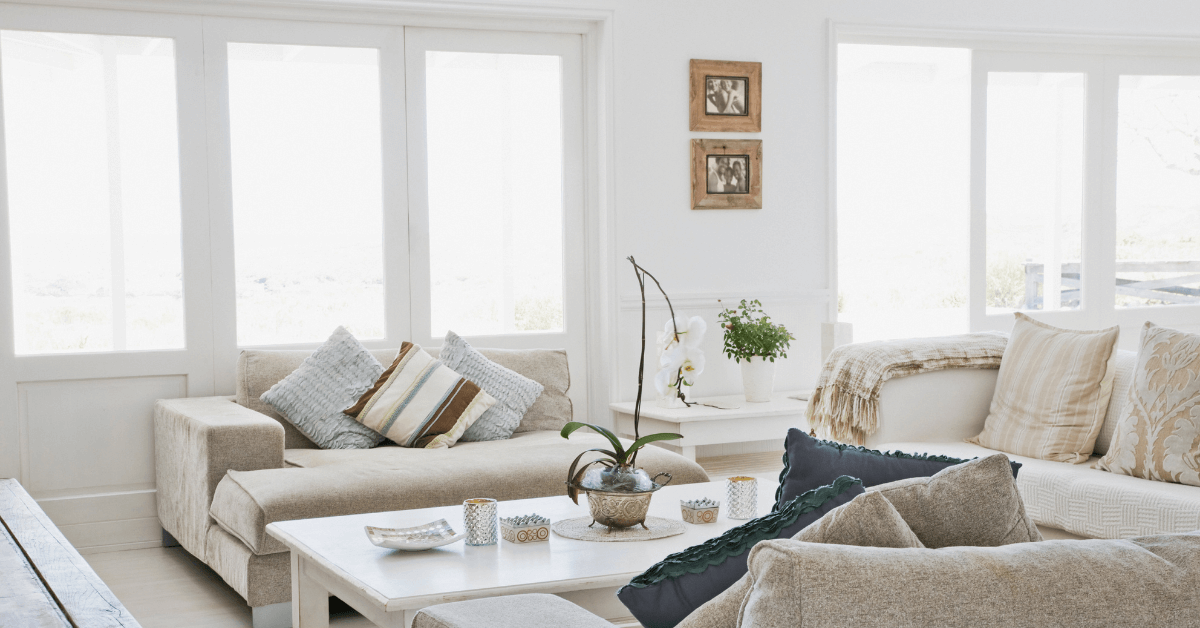
Even the best photos can’t make up for a house that looks untidy. Before coming over, ask your sellers to tidy away as much clutter as they can. Spaces tend to photograph better when counters are clear, magnets are taken off the fridge, personal items have been put away, and there’s nothing to distract from the home’s best features.
After everything’s been cleared away, you might find the house looks a little threadbare. You can do some simple staging to add a bit of ambience. One of the best ways to do this is to make the photos reflect the season. In the colder months, try lighting the fire, adding a cosy throw on the couch, and capturing the fallen leaves outside. And for spring and summer, a simple vase of flowers always looks nice.
One of the most crucial real estate photography techniques is to use natural light as much as possible. This is why it’s important to shoot at the right time of day! Be sure to open all the curtains and blinds before you get started. Sunlight almost always looks better than artificial light, and the view from the windows can also make the space look bigger and more inviting.
Buyers usually have a bit of a mental checklist for the photos they expect to see on a listing. If you leave any of these out, they’ll assume you’re trying to hide something from them. Be sure to include:
Do a walkthrough before you start shooting and create a list of the spaces you need to cover. As you walk through the house, jot down some key features to highlight, like a lovely window in the lounge or the ensuite coming off the master bedroom.
If table legs or the edges of windows are tilted to the side, it can make the photo look weird. Getting super straight lines can be hard to do by hand, but luckily this is where your tripod comes in!
Just be aware that this can cut off things like furniture, so you’ll need to play around with the height to ensure the room looks its best. Many people like chest height, others prefer around waist height. If you’re having issues keeping your verticals straight, you could think about investing in a tilt shift lens.
This is one of the simplest real estate photography techniques, but it can be so easy to overlook. If you’re stressed out or conscious that you need to get to your next meeting, you might miss the house’s best features, forget to photograph a key room, or end up with shaky photos. Try to relax and have fun! Otherwise, you may need to come back for more photos later, which can be a pain.
When you look at your shots later, you’ll likely find that some have issues with the lighting or exposure. Luckily, this is pretty easy to fix after the fact.
Photo editing software, such as Adobe Lightroom, can be really helpful for fine tuning your shots. If you think that might overextend your skill set, you can hire a freelance photo editor to help you get the best possible results.
If you’d prefer a quicker and cheaper option, you could try using photo presets which will correct your colours with just one click. You can find and download presets online, and many are free.
Crafting the best real estate listings isn’t easy! If you’d like a few more tips and tricks, check out these posts:
11 Tips To Help You Shoot An Amazing Real Estate Virtual Video Tour
What You Need To Know When Working With Millennial Home Buyers
What gear do you need?
Technically, you can get away with just using your phone for real estate photography. But because professional photos can have such a big impact on your listing’s success, you may decide it’s worth grabbing a bit of special equipment. It’s best to make sure you have:
- A decent camera. There are many great cameras on the market and the one you choose will depend on your personal preferences and budget. Just make sure you pick one that’s compact and reliable. If you already have a decent digital camera, you probably don’t need to buy a new one.
- Tripod. Tripods are usually pretty cheap, and steady shots always look more professional.
- A wide angle lens. These lenses allow you to show most of a room in a single shot, which means that they’re a staple for real estate photography.
- Plenty of spare batteries and memory cards. The last thing you want is for a shoot to be cut short due to technical issues!
Of course, this isn’t an exhaustive list. If you find that you really enjoy photography, you can always buy new lenses, remote triggers, lights and other fancy gear to take your photos to the next level.
8 effective real estate photography techniques
1. Schedule your shoot carefully
The weather and the time of day often have a big impact on how pictures turn out. Mid morning is often good, as the sun’s fairly bright but usually isn't too harsh. Or, you could try shooting in the late afternoon or early evening to get that “golden hour” look. Soft, dusky light also looks great in exterior shots, as you can turn all the lights on for a warm and inviting effect.
Before deciding what time to schedule for, make sure you check the weather forecast as well. A cloudy day will allow you much more flexibility with the time of day that you shoot than a sunny day, which can be too bright.
2. Remove clutter
Even the best photos can’t make up for a house that looks untidy. Before coming over, ask your sellers to tidy away as much clutter as they can. Spaces tend to photograph better when counters are clear, magnets are taken off the fridge, personal items have been put away, and there’s nothing to distract from the home’s best features.
3. Show the season
After everything’s been cleared away, you might find the house looks a little threadbare. You can do some simple staging to add a bit of ambience. One of the best ways to do this is to make the photos reflect the season. In the colder months, try lighting the fire, adding a cosy throw on the couch, and capturing the fallen leaves outside. And for spring and summer, a simple vase of flowers always looks nice.
4. Let there be light
One of the most crucial real estate photography techniques is to use natural light as much as possible. This is why it’s important to shoot at the right time of day! Be sure to open all the curtains and blinds before you get started. Sunlight almost always looks better than artificial light, and the view from the windows can also make the space look bigger and more inviting.
5. Include all the key spaces
Buyers usually have a bit of a mental checklist for the photos they expect to see on a listing. If you leave any of these out, they’ll assume you’re trying to hide something from them. Be sure to include:
- Each bedroom.
- The kitchen.
- The living room.
- Each bathroom.
- The laundry.
- The garage or carport.
- A view of the house from the street.
- Key outdoor areas, like a backyard or courtyard.
Do a walkthrough before you start shooting and create a list of the spaces you need to cover. As you walk through the house, jot down some key features to highlight, like a lovely window in the lounge or the ensuite coming off the master bedroom.
6. Keep vertical lines straight
If table legs or the edges of windows are tilted to the side, it can make the photo look weird. Getting super straight lines can be hard to do by hand, but luckily this is where your tripod comes in!
Just be aware that this can cut off things like furniture, so you’ll need to play around with the height to ensure the room looks its best. Many people like chest height, others prefer around waist height. If you’re having issues keeping your verticals straight, you could think about investing in a tilt shift lens.
7. Allow enough time
This is one of the simplest real estate photography techniques, but it can be so easy to overlook. If you’re stressed out or conscious that you need to get to your next meeting, you might miss the house’s best features, forget to photograph a key room, or end up with shaky photos. Try to relax and have fun! Otherwise, you may need to come back for more photos later, which can be a pain.
8. Edit your photos
When you look at your shots later, you’ll likely find that some have issues with the lighting or exposure. Luckily, this is pretty easy to fix after the fact.
Photo editing software, such as Adobe Lightroom, can be really helpful for fine tuning your shots. If you think that might overextend your skill set, you can hire a freelance photo editor to help you get the best possible results.
If you’d prefer a quicker and cheaper option, you could try using photo presets which will correct your colours with just one click. You can find and download presets online, and many are free.
Crafting the best real estate listings isn’t easy! If you’d like a few more tips and tricks, check out these posts:
11 Tips To Help You Shoot An Amazing Real Estate Virtual Video Tour
What You Need To Know When Working With Millennial Home Buyers